Sunday, October 31, 2010

Outback Chicken Recipes - Is it Really the Best Chicken?

Chicken, it seems, is so easy to make a meal out of. I'm always on the lookout for new chicken recipes or jotting down restaurants where the chicken dish has been so very good. Surprisingly, one of my favorite places to go for a good chicken dinner is Outback Steakhouse.

Perhaps somewhat misleading with its name, Outback does indeed serve foods other than steak. I love the chicken dishes from this Steakhouse. I thought maybe I can make these dishes myself, rather than dragging my family out to dinner, where we will inevitably wait for an hour, and then spend the meal coaxing my son to eat something other than bread, and to stop throwing his rejected pile of food on the floor. Although, amazingly, Outback's chicken was something that stood up to even my 1 and 1/2 year old's superior palate. Dining out with small children is not always the 'family fun' experience people make it out to be.

I figured making these chicken dishes myself might spare me the ensuing headache, as my son already has a pile of discarded food under our dining room table, which can conveniently be sucked up with the vacuum that is kept within reach for that very purpose.

Trying to find the recipes was harder than I thought. Many recipes I found claimed to be the original. At last, I decided the best way to solve this dilemma was to make several of the dishes and find out once and for all which recipe was the indeed the original.

Alas, after many nights in the kitchen, after vacuuming reject half-eaten bites of chicken from the floor I realized I wasted copious amounts of time and the paper-thin patience of small child on sham Outback chicken recipes.

Ingredients

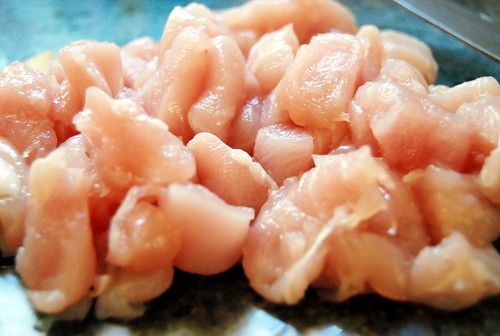
* 4 boneless skinless chicken breasts, 1/2 " thick
* honey mustard
* 6 slices bacon, sliced in half
* 1/2 teaspoon McCormick's Season All
* 1 cup sliced mushrooms, drained
* 3 cups shredded colby or monterey jack cheese

Directions

1. Rub chicken breast with Seasonal All and set aside to marinate for 1 hour.
2. While the breast is marinating fry bacon crisp and drain.
3. Sauté chicken breasts on medium heat in pan with just enough oil to prevent sticking.
4. Cook on both sides until a slight golden color and cooked in the middle but not dry.
5. Remove from pan and place in a 9 x 13 dish.
6. Spread chicken breast with honey mustard, cover with a layer of mushrooms, three pieces of bacon and then sprinkle with shredded Colby/jack cheese, chicken should be covered with shredded cheese.
7. Bake at 350 degrees about 15 minutes or until cheese melts.
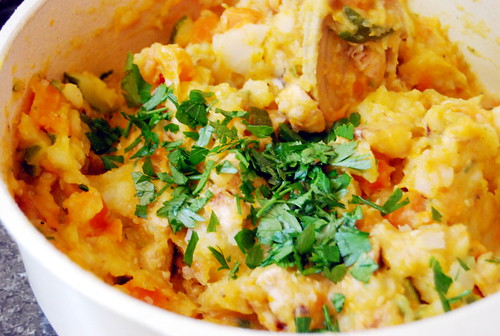
8. Sprinkle with parsley and extra honey mustard may be served on the side.


How would you like to recreate the most famous popular recipes at home? This famous cookbook exposes all of the most famous and most delicious secret recipes on the planet including restaurants such as the Outback Steakhouse. Don't waste your time like I did!

Click here to check it out.

My Links : anolon professional 12 piece nonstick cookware set simply calphalon nonstick 10 piece set anolon advanced bronze 10 piece cookware set

Saturday, October 30, 2010

Deep Fat Frying - The Truth

Deep fat frying is a culinary delight that is often debased because of the many examples of appalling deep fry cooking that bring the fine art into disrepute; this article aims to clarify things for those many cooks who might be understandably concerned and who wish to ensure that they get things right.

You'll have heard that deep fat frying is a dry heat cooking method, this is because no water is involved. Deep fat frying is worth learning to do well. Deep fat frying cooks by sealing the outside of the food being cooked, then using the retained heat within the oil to cook the food through until it is ready for eating. Deep fried food, if cooked well should never be greasy. If it is there is a problem.

Using the right oil is important; never use unstable oils as nasty effects can arise. Always ensure that the oil is at the right temperature before you submerge food into the fat, typically most deep fat frying requires a temperature of 330 to 375 degrees F, [that's 160-190 Celsius]. If you have the wrong temperature the desired cooking effect will not be achieved and you're likely to end up with frizzled or soggy food, or worse a fire. Get it right and the food will be golden in color, crispy in texture on the outside and soft on the inside and beautifully tasty; and as a bonus as healthy as ever you would wish.

It is important to change the cooking oil frequently, once a week under heavy use every 2 to 3 weeks if its just used with vegetables. Failure to do this will lead to food tasting all the same, fishy chips and 'chippy' fish!. It's important to do this not only because of the products that remain in the oil after you have used it spoiling flavors but also because the high temperatures attained during the deep fat frying process itself can lead to partial decomposition of the oil and the formation of toxic side products.

Another simple question that often arises relates to whether the frying pan should be aluminium, stainless steel or cast iron. Which is best? In my view there are benefits associated with each and there is no clear winner. However, this said, I would suggest that when selecting your pan ensure that it is: easy to clean and of a deep and of solid construction.

As a general guide, don't buy cheap! It isn't safe, nor will it be economical over the longer term as cheaper pans just don't last. As such a quality stainless steel pan or one made of cast iron are the long term winners albeit they tend to be more expensive.

So what cooking oils should be used? The general advice is that deep fat frying is only safe when stable oils are used. A stable oil is one with a high smoke point.

Personally as I live and cook in France for much of the year I use and much prefer olive oil. I believe this to be the best deep fat frying oil to use by the 'proverbial mile'. The choice is yours.

To conclude, here are 10 simple healthy tips for when you're deep fat frying next:


Take care when deep fat frying; accidents easily happen and without the right care your food will not turn out for the best;
When deep fat frying always ensure that the fat is 350-375 degrees F and that you have a burner that can retain the required temperature after the food has been added to the oil. Use a deep fry thermometer to make sure the temperature is right. If you don't have a thermometer you can use a half inch cube of white bread. The oil is ready for cooking when you drop this into the oil and it browns up in 60 seconds; If the oil is continuously smoking then it is far too hot at such a time its critical you turn off the source of heat immediately
Cooked food should be kept hot whilst the fat is draining off onto absorptive paper after deep frying; to keep food warm keep put it in the oven at 180-200 degrees F
Never leave a deep fat fry pan that's being used unattended. Keep a constant eye on the pan. Above all watch for over heating. Keep a lid close by to cover your pan should it catch fire;
When deep fat frying potatoes cook until they are just starting to crisp up, remove and drain on a rack..
When deep fat frying foods, inevitably particles from previous batches of food are left in the oil; these should be removed by straining as they will spoil the taste of the food cook thereafter; the oil should then be stored in a capped bottle; always discard your oil if it becomes dark in color;
When deep fat frying always dry the food before you put it into the hot oil.
Deep fried food needs to cook evenly so don't overcrowd the pan;
Never fill your pan too full of oil. There should be at least 2" of space from the top of the oil to the top of the pan as the oil will fizzle up when the food is first introduced. And
Do not allow water to come into contact with hot oil or there could be a violent and dangerous explosion.


Stephen Kember is the Proprietor of The Outdoor Cooking Equipment Store where you'll find exceptional value outdoor cooking equipment, great recipes and a selection of articles helping you to cook outdoors.

If this article has stirred your interest in deep fat frying at the store you will find a wide range of aluminum, stainless steel and cast iron deep fat fryers all at exceptional prices in the run up to Christmas; go to the Outdoor Cooking Equipment Store.

Visit : all clad master chef 2 14 piece cookware set circulon infinite circulon 10 piece cookware set t fal 10 piece cookware

Thursday, October 28, 2010

Maltese Recipes and Cuisine

Today, the Maltese people enjoy a varied Mediterranean cuisine, particularly influenced by Italian cuisine. Malta however has many historic links with other countries, and many other influences can be seen in Maltese cuisine, for example, Moorish influences.

Some popular Maltese dishes include:

- Aljotta - A fish soup containing garlic, herbs and tomatoes that is often served with rice.

- Brodu - A broth containing meat (beef or chicken usually) and vegetables, and served with pasta.

- Kusksu - A thick soup made from chicken stock, and containing broad beans, pasta beads (known as "kusksu"), onions, tomato paste and garlic.

- Minestra - A thick vegetable soup, particularly popular in Winter, and usually eaten with crusty Maltese bread known as "hobza".

- Soppa ta' l-armla - Literally translated, "soppa ta' l-armla" means "widow's soup", the dish supposedly having gots its name because neighbors donated it poor widows living in their communities. Soppa ta' l-armla is a thinner version of minestra (vegetable soup), but with the addition of fresh gbejniet (small, round cheeses, made from sheep's milk) which melt in the soup, and raw eggs added at the end to coagulate the soup.

- Bigilla - A traditional bean dip made from mashed dried broad beans with seasonings and optionally chili.

- Kapunata - The Maltese version of ratatouille. Served hot or cold, and even used as a pizza topping.

- Mqarrun il-Forn - Baked macaroni with bolognese sauce and egg. Bacon and peas are added in some versions of the recipe, and the dish is usually topped with a layer of grated cheese or bescamella (white sauce).

- Timpana - A pastry covered version of Mqarrun il-Forn (baked macaroni). A small amount of ground (minced) beef, and sometimes hard-boiled eggs, are added, then then the whole thing is encased in a pastry crust.

- Ross il-Forn - Baked rice. This dish is similar to Mqarrun il-Forn, but with rice instead of macaroni (water is added before cooking), and the addition of curry.

- Ravjul - The Maltese version of ravioli, filled with ricotta and parsley (and sometimes spinach), or with minced meat. The dish is covered with a tomato sauce and topped with cheese.

- Bragjoli - A thin slice of beef surrounding a mixture of breadcrumbs, bacon, eggs and cheese.

- Fenkata - Rabbit served in tomato sauce or gravy. The meat is usually light fried and then simmered as a casserole for several hours.

- Laham taz-ziemel - Stallion meat with white wine sauce.

- Lampuka - Mahi-mahi, a white fish. It can be eaten pan-fried with olive oil, oven-baked with a tomato and wine sauce, or made into fish pies.

- Qargha Baghli - Stuffed marrows with ground (minced) beef and parsley. They can be baked or made into a creamy soup.

- Zalzett tal-Malti - A traditional Maltese sausage made from pork and flavored with black peppercorns, coriander seeds, parsley, sea salt, and sometimes garlic. There are varieties which are dried and others that are eaten fresh.

- Imqaret - A deep-fried pastry filled with dates.

- Pastizzi - Pastry stuffed with ricotta or a mushy pea mixture.

- Figolla - An icing-coated biscuit stuffed with sweet ground almonds. It is traditionally eaten at Easter, and made into shapes such as a fish, a lamb, a heart, etc.

- Helwa tat-Tork - "Turk's sweet" - The Maltese version of Halva.

- Kwarezimal - Biscuits, traditionally eaten during Lent.

- Pudina ta' l-Hobz - Bread pudding. Pudina ta' l-Hobz is made from stale bread, soaked in water over night, and milk, cocoa, sugar, dried fruit, nuts, and sometimes liqueurs, are then added.

- Qaghaq ta' l-Ghasel - A light pastry ring made with honey or treacle. Originally eaten at Christmas, but now popular all year round.


Originally published at http://www.recipesmaniac.com/cook_maltese.php - visit this site for more information, photographs and cook books.

Discover more about recipes and cooking at http://www.recipesmaniac.com/

Tags : all clad copper core 10 fry pan

Wednesday, October 27, 2010

Chicken With Avocado Sandwiches and Avocado Bacon Sandwiches Recipes

Do you know that avocados make great sandwiches, but only if you know the right recipes. Avocado and chicken tortas, avocado bacon sandwiches and avocado chicken melt are 3 delicious avocado recipes you can learn to prepare.

Below are the recipes:

1. Avocado and Chicken Tortas

Ingredients:

- 1 fully ripened Mexican avocado
- 2 (6-inch) sandwich rolls (such as Portuguese or submarine rolls), halved
- Salt and freshly ground black pepper, to taste
- 8 ounces grilled chicken breast, sliced
- 1 cup shredded iceberg or romaine lettuce
- 1 tomato, sliced
- 2/3 cup mashed black beans, divided
- 1/4 cup pickled jalapeño pepper slices

Directions:

- Cut lengthwise around middle of avocado; twist avocado to separate halves; strike pit with a knife blade to remove; scoop out pulp with a spoon.
- In a small bowl, mash avocado.
- To assemble tortas: Spread mashed avocado on cut sides of rolls, dividing evenly.
- Sprinkle with salt and pepper. On bottom halves, layer sliced chicken, lettuce, tomato, black beans and jalapeño pepper slices.
- Firmly press tops of rolls on tortas.

Yield: 2 sandwiches

2. Avocado Bacon Sandwiches

Ingredients:

- 1/4 pound bacon slices, chopped
- 1 ripe avocado
- 1/2 teaspoon lemon juice
- Salt and pepper, to taste
- 3 tablespoons butter, softened
- 4 large slices whole wheat bread
- Lemon twist and parsley sprig, to garnish

Directions:

- Fry bacon until crisp. Drain on paper towels.
- Peel avocado, taking care not to remove bright green flesh just inside the skin.
- Cut in half and remove seed.
- In a bowl, mash avocado, then stir in lemon juice, salt and pepper.
- Butter two slices of bread.
- Spread avocado mixture on buttered sides of 2 bread slices.
- Scatter bacon over avocado.
- Cover with remaining bread slices, buttered sides down, and press together.
- Cut off bread crusts.
- Cut each sandwich into 4 triangles.
- Arrange on a serving plate, garnished with a lemon twist and parsley sprig.

3. Avocado Chicken Melt

Ingredients:

- 4 boneless skinless chicken breast halves
- 1/2 cup cornmeal
- 1 teaspoon garlic salt
- 2 tablespoons vegetable oil
- 1/2 firm ripe avocado, peeled and sliced thin, divided
- 1 cup shredded Monterey jack cheese
- 4 wheat bread slices, toasted
- 1/2 cup plain yogurt
- 1/4 cup chopped sweet red bell pepper

Directions:

- Rinse chicken with cold water and pat dry with paper towels.
- Place between two sheets of plastic wrap and pound to flatten to 1/4-inch thickness.
- In resealable plastic bag, combine cornmeal and garlic salt.
- Add chicken; close bag and toss to coat well.
- In large nonstick frying pan, heat oil.
- Cook chicken in hot oil for 2 minutes per side or until lightly browned.
- Remove chicken from pan and place in shallow baking pan.
- Place half of avocado slices over chicken and sprinkle evenly with shredded cheese.
- Bake at 350 degrees F for 15 minutes or until chicken is done and cheese is melted.
- Place each chicken breast on a slice of toast.
- Top with remaining avocado slices.
- In small bowl, combine yogurt and pepper; serve with chicken.

Yields 4 servings.


Next, you welcome to visit our website: The Delicious Recipes Package and Cheap Meal Ideas Recipes for more delicious recipes.

Friends Link : calphalon tri ply stainless steel 13 piece

Tuesday, October 26, 2010

Chicken Tender Recipes - Easy & Quick To Prepare!

These chicken tender recipes are easy, quick and delicious. Just check these out and I'm sure you'll be amazingly surprised.

So put your hat on and get ready for some quick easy chicken tender recipes:

>> Turkey or Chicken Tenders

1 1/4 lb Fresh turkey tenderloin Or boneless chicken breast

1 1/4 c Divided oat bran cereal

1 t Salt

1/2 ts Pepper

2 lg Egg whites

2 tb Lowfat evaporated milk

1 t Paprika

1/2 c Peanut oil

Cut turkey tenderloins or chicken breasts into 6 slices by cutting cross the turkey carefully with sharp knife. Pound tenders to 1/4 inch thickness. Slit around edges to keep from curling. Blend 1/2 cup of
the oat bran cereal with salt and pepper and coat tenders. Whip egg whites lightly with milk.

Blend remaining 3/4 cup oat bran with paprika. Dip meat into egg whites, then into oat bran paprika mixture. Place on baking rack and allow 5 minutes to dry. Heat peanut oil in large frying pan until hot. Brown tenders 2-3 pieces at a time for 3 minutes per side, or until crusty and brown. Drain well and serve with a low-fat dip.

>> Crispy Chicken Tenders

1 c All-purpose flour

1 ts Poultry seasoning

2/3 ts Paprika

1 ts Onion powder

1/2 ts Garlic powder

1/4 ts Salt ds Pepper

1 Egg

1 ts Milk

3/4 lb Chicken tenders Cooking oil

Combine dry ingredients in a plastic bag. In a bowl, lightly beat eggs
and milk. Dip chicken pieces in egg mixture and shake off excess. Shake a few chicken pieces in the bag at a time, coating well.

In a large skillet, heat 1/4 in. of oil over high heat; brown chicken on all sides. Reduce heat to medium and continue cooking for 10 minutes.

That's it for today! If you want more chicken tender recipes just check below:


Nathalie Sanders is a chef mom. She reveals her delicious recipes and up-to-date cooking tips in a very famous newsletter: Quick Easy Recipes Secrets. She is also a fan of Secret Restaurant Recipes. You can grab a copy here: Copycat Recipes.

Thanks To : kitchenaid 10 piece cookware set

Monday, October 25, 2010

Top Chef Secrets - How to Make Savory Fried Chicken

One of the most popular foods in America is fried chicken. When most people want a delicious meal of fried chicken they run out to the local fried chicken fast food restaurant and grab a bucket. The one thing they probably do not realize is that they could easily prepare this enjoyable dish themselves, it is not that complicated or time consuming.

Ingredients:

1 Quart of buttermilk

2 Cups of buttermilk separate from the quart

2 Tablespoons of salt

2 Teaspoons of pepper

Hot sauce

8 pieces of chicken (usually a mixture of breasts, thighs, and legs

1 Tablespoon garlic powder

1 Tablespoon onion powder

1 Tablespoon paprika

4 Cups of flour

Peanut Oil

Other Items Needed;

2 Mixing Bowls

A Whisk

2 Large Dishes (for coating the chicken in flour)

Deep Cast Iron Skillet

Meat Thermometer

Oil Thermometer

Once you have assembled all the necessary ingredients you will need to get a large mixing bowl. In the bowl you will need to combine the one quart of buttermilk, the two tablespoons of salt, the 2 teaspoons of pepper, and your desired amount of hot sauce, if any. You could also add some of your own favorite spices if you would like. Make sure all these ingredients are thoroughly whisked together. Now, take you chicken pieces and put them in the bowl making sure to coat them with the mixture generously. Preferably you would want to let the chicken sit in the mixture for no less than four hours, but if you are constrained by time ten to twenty minutes would be ok.

Next, take the other two cups of buttermilk and pour into another bowl. Separately take your flour and mix it with the garlic powder, onion powder, paprika, and any of your other favorite spices. Take the flour mixture and separate it evenly into two large dishes. You will now need to take your chicken out of the mixture it was in and drain it and dry it lightly. Take the chicken pieces and roll them around in your first dish of the flour and spices. Once your piece it thoroughly covered in the flour take it and dip it in the bowl of buttermilk. Shake off any excess and put it in your second batch of flour, making sure to cover the whole piece with flour. Repeat this process for all the pieces of chicken.

You will now need a fairly deep cast iron skillet to begin frying the chicken. Fill the skillet to about three inches with your peanut oil. You will need to heat the oil to around 375º F. You will want to have a proper thermometer handy because you don't want the oil to be too hot or too cold. Take a few pieces of chicken and gently place them in the oil. Rotate them occasionally until they are golden brown on the outside and thoroughly cooked on the inside. Chicken should be cooked until its internal temperature is about 180º F, which should take around twenty five minutes of frying. Repeat this process for the remaining pieces of chicken. You now have delicious homemade chicken. Serve and enjoy!


This article was written by Jura Capress and provided by LiveLoveCoffee which is an online coffee house featuring espresso machines and coffee grinders.

Friends Link : cuisinart multiclad unlimited 12 piece cookware

Friday, October 22, 2010

Quick and Easy Healthy Chicken Recipes

If you are looking for some new quick and easy healthy chicken recipes to prepare, I've got something delicious that I would love to share with you. Prepared with a healthy body in mind. Chicken is a family favorite, so I am always searching for healthy, tasty and quick to prepare recipes.

Keeping it healthy, I always prepare my pans with PAM or simply rub olive oil on the meat rather than oiling the pan. This practice helps to moisten the meat without leaving it to swim in oil or fat. Salt is kept to a minimum while fresh herbs and a few spices are used instead. Lemon works well with many healthy chicken recipes. It's a great taste that doesn't add any fat and very few calories.

A wife and mother of three boys, I also look for quick and easy recipes that my family will enjoy. It's no fun eating diet foods when the rest of the family is enjoying their favorite meal. So many of my recipes are for the whole family. My lip-smacking Oven Baked Fried Chicken will make you think it was fried in a cast iron skillet and crisped up the way grandma used to do it. Remember: portion size is important when it comes to losing weight, even when the food is prepared in a low fat, healthy manner.

For this recipe you will need:

4 skinless, boneless chicken breasts
1 Tbsp olive oil
1/4 cup Corn Flakes, crushed
1/4 cup Bread Crumbs
Salt to taste

Rub chicken with olive oil.
Add a little salt for flavor.
Pat with bread crumbs on each side
Roll in corn flakes.

Place in prepared baking dish and bake on 350 degrees for 30 minutes. Check for doneness, depending on how thick your chicken breasts are, they should be done or nearly done.

Health Benefits: Chicken is a great source of protein that is low in fat, especially when the skin is removed. If you like the moisture that the skin provides, you can leave it on while cooking but remove it before eating to keep it low fat. Remember every cell in your body depends on protein for growth, be sure to have a serving of protein with every meal.


Karen Ficarelli is the founder of Fitness4Her.com, a diet, exercise program and women's fitness blog, developed especially for women. A mother of three, Karen knows how hard it is to fit everything into a busy schedule. A fitness author, personal trainer, Pilate's instructor, sports nutritionist, fitness model, wife and mom, she's passionate about helping women reach their fitness goals.

My Links : calphalon tri ply stainless steel 13-piece all clad lasagna pan

Thursday, October 21, 2010

Boneless Skinless Chicken Breast Recipes - Two Quick, Easy, and Healthy Recipes

Boneless skinless chicken breast recipes are easy to make, quick to get to table, and good for you. The most common way to prepare them involves oven cooking to reduce fat content that frying may not offer.

However, if small amounts of olive oil are used for frying many recipes can be developed which are faster than oven baking and just as nutritious. One such recipe is Chesapeake Chicken.

Chesapeake Chicken

Chicken breasts
1 Tbsp. olive oil
1 Tbsp. butter
1 to 2 Tbsp.Old Bay seasoning
3/4 cup Low fat whipping cream

Fry chicken breasts in olive oil and butter until almost cooked (15-25 minutes)
Add Old Bay seasoning to taste (2 Tbsp is a very spicy amount)
Add low fat whipping cream
Simmer until thickened, stirring occasionally

Oven Baked Chicken Breast

This low fat meat should be a vital component of any healthy diet plan. It is a relatively inexpensive source of quality protein.

As tasty as this is you have to remember that you don't need as much protein as Americans usually eat every day. Your daily protein requirement is a piece of meat approximately the size of a pack of playing cards. Keeping that visual in mind will help you determine proper portion size.

Oven Baked Chicken Breast With Onions And Bell Pepper

Chicken Breasts
2 medium onions, sliced
2 bell peppers, cut into rings then halve rings
3 Tbsp. olive oil
2 Tbsp. butter
Sea salt to taste

Coat the chicken breasts with 1 Tbsp. of olive oil and place into baking pan
Sprinkle chicken breasts with sea salt
Bake chicken uncovered in 350 degree preheated oven for 45 minutes
Place onions in a skillet with 1 Tbsp. of butter and 1 Tbsp. olive oil then sauté until translucent
Place bell pepper in a separate skillet with 1 Tbsp. of butter and and 1 Tbsp. olive oil then sauté until slightly browned

Serve with a side of sauteed onion and bell pepper. Place the onions on one side of the chicken breast and peppers on the other. This will add visual interest to your dish and keep the flavors separated.

A side dish of whole grain pasta and marinara sauce (marinara from a jar is fine) will add a great accoutrement to this dish. Garnish with grated Parmesan cheese.

Served with a hearty red wine this simple meal becomes an elegant offering fit for guests.

Begin the meal with a large salad or raw vegetable platter. This will give you the raw food enzymes that are destroyed when food is heated. Such a diverse offering will give you a wide array of nutrients.

The sea salt adds minerals to your foods. Olive oil is very "body friendly" and is always a welcome addition to any dish. Butter offers wonderful flavor and "anti-stiffness" factors. Red wine offers anti-oxidants and is therefore part of a heart smart diet.

Now you have two great boneless skinless chicken breast recipes you can eat knowing they are offering you vital nutrients to make you healthier. Great taste, when combined with "body friendly" versions of your favorite recipes will allow you to eat healthy and not feel the least bit deprived.


Dale Heil, D.C.
http://Eat-Healthy-Diet-Plan.com

For additional recipes to eat a healthy diet plan please visit: http://www.eat-healthy-diet-plan.com/Healthy-Lunch.html

Related : cuisinart multiclad unlimited 4 quart saucepan cuisinart chef's classic 14-piece cookware set le creuset enameled cast iron 9 skillet

Wednesday, October 20, 2010

Easy Dinner Recipes - Almond Chicken & Easy Chinese Stir Fry

Almond Chicken

This is a classic chicken dish that is made super easy by making it a one pot meal.

Ingredients:

8 boneless skinless chicken thighs
1/4 cup zesty Italian dressing
1 cup chicken broth
1 can green beans, drained
1 cup minute rice, uncooked
1/4 cup sliced almonds

Place chicken and dressing in a Ziploc bag. Toss to coat. For greater flavor, let chicken marinade for up to 2 hours.

In a large skillet, add chicken with dressing and cook over medium-high heat. Cook on each side for about 4 minutes or until browned.

Add broth to pan and bring to a boil. Cover and simmer for 10 minutes. Add beans and cook 5 minutes longer or until chicken is cooked completely.

Remove chicken from the skillet and keep warm. Add rice and almonds to the skillet. Remove from heat and cover. Let stand 5 minutes. Serve chicken over rice mixture.

Easy Chinese Stir-Fry

The dressing and hoisin sauce combine to make a delicious stir-fry sauce. Hoisin sauce is available in the Asian section of most major grocery stores.

Ingredients:

1 teaspoon vegetable oil
1 pound pork loin or chicken breast, cut into thin strips
3 cups sliced carrots
1/3 cup balsamic vinaigrette dressing
2 tablespoons hoisin sauce
2 green onions, thinly sliced
In a large skillet heat oil over medium-high heat. Add chicken or pork and carrots; cook for 5 minutes
In a small bowl combine dressing and hoisin sauce. Add to meat and carrots. Cook 7 minutes or until carrots are tender to the bite.

Add green onions and cook 1 minute longer. Serve immediately.

Makes 4 servings.


Audra Elizabeth is an avid recipe collector and enjoys preparing quick and easy dinners for her family.

Thanks To : circulon classic 14 piece cookware all clad copper core 12 fry pan all clad masterchef 2 7 piece cookware set

Tuesday, October 19, 2010

Indian Style Chili Chicken

This preparation of chili chicken is an Indian Chinese dish that is very easy to make at your home for dinner. It is actually quicker than you think. It takes about 30mins to prepare this delicious, mouth watering chinese delicacy made in Indian style.

Shopping List

Boneless Chicken - 500gm
Soy Sauce
Tomato Ketchup
Cornflour
chili Sauce
Ginger Paste
Vinegar
2 Eggs
Lots of Green chilis
Onion
Capsicum
Ajeena-moto
Vegetable Oil
Salt

Preparation Time: 15mins

Cooking Time: 20mins

Serves: 4

Steps

1. Wash the boneless chicken (500gram) properly and cut it into small pieces (cubes).

2. Take a bowl put the chicken cubes into it, then add 3 tablespoon soy sauce, 1 tablespoon cornflour, 2 tablespoon tomato sauce (ketchup), 1 tablespoon chili sauce, 1 teaspoon ginger paste, 1/2 teaspoon vinegar, 1/2 teaspoon salt and 2 eggs (separately beaten in a bowl). Mix all the ingredients well and marinade for 1 hour. If you want extra-hot, you can add 5-6 green chilis split into halves in this mixture.

3. In a non-stick pan add 2-3 tablespoon of vegetable oil and heat for 2 mins.

4. Fry the marinated chicken till golden brown and keep aside. Ensure the mixture is thick enough to stay on the chicken pieces. If not, you can add more cornflour to thicken it. Keep the thick mixture for use in Step 6.

5. Take a non stick kadhai (deep bowl) and put 2 tablespoon of vegetable oil and heat for 4 mins then add 5-6 green chili split into halves and fry till the seeds pop. Add 1 big onion (chopped into medium size pieces) along 1 medium chopped capsicum and 1 teaspoon salt and fry till slightly brown and half cooked.

6. When the above mixture (step 5) becomes little tender then add the remaining marinaded liquid mixture (Step 4) and stir well. Close the lid of the kadhai for 2 mins to allow the ingredients to cook.

7. Open the lid and pour some water in the khadai so that the gravy does not become too thick and sticks at the bottom, hence stir often. Cook for few mins.

8. When the oil is released out of the gravy (which means the gravy is cooked now), then add the fried chicken (step 4) and mix them in the grave well. Cooked for 5 mins, stir occasionally otherwise it will get stuck to the bottom of the kadhai. Taste the gravy and add salt and/or green chili if required.

9. Finally put 1/2 teaspoon ajeena-moto into the gravy and cook for 1 min.

Caution: The amount of salt added (either during the marinade or during cooking) must be as per taste and controlled as the ketchup and other sauces do have salt in them as well.

This item can be served with fried rice, noodles or lachha paratha. To view the recipe photos, suggested main dishes and discussions, visit Chili Chicken Recipe on Best of Kanchan's blog.


About the author: Kanchan Shaw is an Indian housewife who loves to cook and share the recipes on her blog: Best of Kanchan.

Tags : cuisinart multiclad 12 piece cookware set lodge logic pre seasoned 9 quart dutch oven simply calphalon nonstick 10 piece set

Monday, October 18, 2010

Garlic Chicken Recipes - Easy & Quick To Prepare!

These garlic chicken recipes are quick, easy and delicious. Just check these out and I'm sure you'll be amazingly surprised.

So here we go for some garlic chicken recipes:

>> Garlic Chicken Pot

1 can chicken broth non fat

1 large onion sliced 1/4 thick

1/4 cup soy sauce, low sodium

2 heads garlic roasted

2 pounds chicken breasts without skin cubed

2 tablespoons soy sauce, low sodium

2 tablespoons cornstarch

7 ounce pkg chinese sausage (dynasty) sliced 1/4 thick

In a large bowl marinate chicken with the 2 tbs cornstarch, and 2 tbs soy sauce, put in frig for 30 minutes or longer. In a large non stick pan cook chicken, onion, sausage, covered until chicken is almost done.

Add chicken broth, 1/4 cup soy sauce, and garlic, mix well and cook till chicken is done. The broth should thicken a little.

I learned the following garlic chicken recipe from a friend. Check it out:

>> Broiled Chicken With Garlic

2 1/2 pounds chicken quartered

3/4 teaspoon powdered rosemary salt & pepper to taste chicken bouillon

6 cloves garlic

Rub chicken with 2 pressed garlic cloves, and rosemary. Also rub with salt and pepper. Let stand 30 minutes. Put chicken in broiler pan and coat top with bouillon. Sprinkle with 2 slivered garlic cloves. Add a little bouillon to pan. Broil turning when half done.

Coat top sides with bouillon and 2 more slivered garlic. Also rub with salt and pepper. Let stand 30 minutes. Put chicken in broiler pan and coat top with bouillon. Baste with pan drippings.

That's it for today! If you want more garlic chicken recipes, be sure to visit us today at:


Easy Recipes Secrets is the world's favorite cooking newsletter.

See Also : rachael ray 10 piece cookware set cuisinart chef's classic 17-piece

Saturday, October 16, 2010

Antique Recipes from Chefs of the Past - Part II

Fried Frogs - Bartolomeo Scappi, Italian, active 1540 -1570

Ingredients:

48 frog legs, 3 spoons of minced parsley, some crushed garlic cloves, the juice of 1 lemon, flour, oil for frying, salt and pepper

Preparation:

Keep the frog legs in cold water for a few hours. Dry them off. Add salt and pepper to the flour and then use it to flour the frog legs. Fry them until they are lightly browned and tender, adding the garlic cloves about halfway through frying. Drain the frog legs and remove the garlic, then allow the legs to dry off on absorbent paper. Add salt, garnish them with parsley and lemon juice and then serve.

Chicken casserole with peas - Francois Pierre de La Varenne, French, 1615-1678

Ingredients:

One whole chicken of about 2.5-3.5lbs, 3 cups of chicken broth, 1 large romaine lettuce (cut to 5cm pieces), 30g butter, 350g fresh peas, ½ cup water, 1 teaspoon sugar, salt and pepper, 4 slices white bread without crust.

Preparation:

Place the chicken, stomach up, in a large and deep pan. Pour 2 cups of broth into the pan and slowly bring it to a simmer. The chicken breasts will be cooked by steam while the legs will be immersed in the broth. Cover the pan and let it boil for an hour or until the chicken becomes tender. Take the chicken out and keep it hot. Continue boiling the broth until it has reduced to 1 cup. Wash the romaine lettuce in cold water and dry it. Melt the butter in a casserole and add the peas, cook over a low flame for a few minutes without letting the peas brown. Add the water, sugar, salt, pepper and lastly the lettuce. Cover the casserole and let cook for 5 minutes until the peas are soft. Shred or grate the bread. Bring the remaining broth back to a boil and add the bread, then cook until it takes on the consistency of semolina. When the chicken is done, place it on top of the lettuce and peas. Pour the bread and broth sauce onto the chicken and serve.

Boston Stewed Beans - Fannie Farmer, United States, 1857-1915

Ingredients:

1kg dried beans, 250g dried salted pork, 1 spoon salt, 1 spoon molasses, 3 spoons sugar, 1 ½ teaspoons powdered mustard.

Preparation:

Keep the beans in water overnight, then start cooking them, bringing the water slowly to a simmer. Let simmer for about 2 and a half hours. Preheat the oven to 120 C /250 F. Slightly boil the pork by putting it in cold water and then bringing it to a boil. Dry it off, then make a few deep cuts into the pigskin about 1.5cm apart and cut off a thin slice from the bottom. Dry the beans, throw out the water. Place the pork at the bottom of the pot in which you cooked the beans (or a casserole if you prefer), then cover it with the beans while keeping the pigskin uncovered (the pot should be almost full). Mix the salt, molasses, sugar and mustard in a cup of water. Add boiling water to cover them, put the lid and place in a pre-heated oven and bake for 6-8 ore, removing the lid for the last two hours.

Muffins - Isabella Beeton, English, 1836-1865

Ingredients:

180g butter, 250g flour, 120g sugar, 1¼ milk, 2 egg yolks, a few drops of lemon extract, 1½ spoons powdered yeast, 12 muffin forms.

Preparation: Grease the muffin forms and heat in a preheated oven (190C/375F). Cut the butter to pieces, place it in a bain marie and mix until it becomes creamy but not melted. Take it off the heat and add flour and sugar, mixing all the while. Let the milk reach near room temperature then mix it the with egg yolks and lemon extract. Pour the milk-based mixture in with the flour-mixture, add the powdered yeast and whisk for about 10 minutes. Place the resulting dough in the muffin forms and bake in a preheated oven for about 30-35 minutes or until the muffins are firm and golden brown.

Stuffed Tomatoes - Francesco Leonardi, Italian, active 1750-1790

Ingredients:

1kg medium-sized tomatoes, 2 slices of pancetta, 2 slices of prosciutto cotto, 150g boiled chicken meat, 10g bread with no crust, 80g grated parmesan cheese, 3 egg yolks, 1 onion, 1 carrot, 1 cup broth, salt and pepper

Preparation for this antique recipe: Wash and dry the tomatoes. Remove their core and seeds with a teaspoon. Soak the bread in water, strain it and place it in a bowl. Mince the chicken meat and then mix it with the butter (softened), parmesan and the egg yolks. Add abundant salt and pepper then mix well. Finely chop the onion, the pancetta, the prosciutto and the carrot. Spread half of each over the bottom of a casserole dish, place the tomatoes on top with the hole face down. Cover them with the remaining chopped ingredients, add salt and pepper and wet with the broth. Bake for 20-25 minutes at 200?C/400?F. Arrange the tomatoes on a serving plate and cover them with the chopped ingredients from the bottom of the casserole and serve either hot or at room temperature.


David Russo, VMD, PhD

Veterinary Scientist, Gourmet Lover and Amateur Cook

GOURMET MEATS AND SEAFOOD [http://www.high-net-worth-gourmet.com]

CONTACT US

Related : cuisinart multiclad pro stainless steel 12-piece calphalon unison 10 piece set

Friday, October 15, 2010

Southern Crispy Fried Catfish

You don't have to be from The Delta or The South to enjoy mouthwatering southern fried crispy catfish. This fish is so succulent and moist that it just melts in your mouth. I am sure that fried catfish has been around as long as the south has.

Come into the kitchen with me and enjoy one of my family favorites.

Items needed
1 cup of yellow or white cornmeal
1/4 cup all purpose flour
2 teaspoons of salt
1/2 teaspoon of ground red pepper
1/2 teaspoon of black pepper
2 teaspoons of garlic powder
1 teaspoon of onion powder
1/4 teaspoon salt
8 4 to 6 oz catfish fillets
large deep cast iron skillet, dutch oven or heavy pot
vegetable oil or peanut oil for frying

Rinse fish and pat dry to remove moisture. Sprinkle fish with the 1/4 teaspoon of salt. Mix meal, flour, salt, peppers, garlic powder and onion powder in a large shallow dish. Dredge fish in cornmeal mixture, coating evenly. Pour oil to depth of about two inches in skillet. Heat to 350 degrees or until oil is hot. Cook in batches of three for 5 or 6 minutes or until fillets are crispy and golden brown. When done remove with slotted spoon and drain on paper towels.

If you wish to keep fish warm after draining, place on a wire rack in an aluminum foil lined shallow pan or cookie sheet in a 250 degree oven. Do not cover fish, covering removes the crispness.

This recipe yields 4 southern servings and goes well with boiled corn, hush puppies and slaw. We also like baked beans, hush puppies and slaw. An old southern favorite is plain pasta with red sauce, corn muffins and slaw. To add a little zest use a splash of lemon, tartar sauce or the southern favorite hot sauce.

Where-ever you are on the globe this dish will not remain on the table for long.


Tags : cuisinart multiclad 12 piece cookware set

Thursday, October 14, 2010

Fried Beef in Oyster Sauce


Image : http://www.flickr.com


A friend of mind asks me a question if there is someone going to the Thai restaurant for the first time, what kind of foods he or she should order. Well, this is a difficult question to answer because there are lots of Thai foods that you should try. I'm pretty sure there will be more than 10 different Thai foods that you will love. However, if you would like me to recommend only 1 menu for someone who never tries Thai food before. I would recommend Fried Beef in Oyster Sauce. This is one of the most popular Thai food among foreigners. I used to cook this menu for my (foreign) friends many times. They all love it !!! I think the reasons are; firstly, it is beef. Everybody loves beef. Secondly, it is not spicy. It is good for someone who never eat chili or spicy food before. Now let's get started.

Ingredients

200 grams of beef (slice into pieces or strips, not to big or small just right for one chew. if you have time you can marinate it with 2 tablespoon of corn starch or cooking flour for 15 minutes. This will make your beef more tender.)

8 tablespoon of cooking oil

3 cloves of garlic, finely chopped

5 white mushroom (cut it in half)

1 tablespoon of light soy sauce

2 tablespoon of oyster sauce

1 teaspoon of sugar

1 teaspoon of pepper

Preparation

1. Put cooking oil in a pan (medium heat)

2. Put garlic in a pan, stir fried for 1 minute

3. Put beef and mushroom in a pan, stir fried for 3 minutes or until it is cooked

4. Put everything else (sauce, sugar, pepper) in a pan, stir fried for another 2 minutes

That's it. You are done now. See ! how easy it is. As I told you, my blog is going to teach you how to cook Thai food with easy step by step that anyone can do it. Now you believe me, don't you ? Okay, that's it for today. I have to go now. Enjoy you meal. Take care.

See you next time!!


Joe Sitthiosoth is an average Joe who is passionate about Thai food and Thai cooking. He travels the world, makes new friend and shows them how wonderful Thai food is. His article comes from his real experience during his journey. You can read more from here [http://EasyThaiCookingByJoe.blogspot.com]

Related : le creuset enameled cast iron 9 quart round french calphalon tri ply stainless steel 13-piece

Wednesday, October 13, 2010

Pan Seared And Baked Hawaiian Wahoo-Ono

Ono, commonly known as wahoo, is a close relative of the king mackerel. Unlike true mackerel, ono rarely school, but groups may be found around fish aggregation buoys. Surface catches indicate that ono associate with banks, pinnacles and flotsam. However, longline catches suggest that this species is also widely distributed in the open ocean. Ono may grow to more than 100 pounds in round weight, but the usual size of the fish caught in Hawaii is 8 to 30 pounds in round weight.

Ono flesh is whiter, flakier, and has a more delicate texture than the meat of other fast-swimming, pelagic species. Although ono may make oceanic migrations as far as those of tuna and marlin, it contains less of the strong-tasting "blood meat" muscle that the latter species use for long-distance swimming.

This recipe can be done inside or on your grill. If grilled, expect the cooking time to be 4 to 5 minutes per side. Ono provides a great canvass for all kinds of side dishes from fried rice to Asian vegetable sautee.

Ingredients:

Hawaiian Wahoo (Ono) 4/6oz or 8/9oz Fillets

2 Tbsp Smoked Paprika Rub

Olive Oil

Sea Salt

Black Pepper

Lemon wedges for garnish

Instructions:Spray pan with nonstick spray or brush with olive oil to prevent sticking.

Preheat on med-high for about five minutes.

Pre-Heat Oven to 350 F

Sprinkle the Salt, Pepper & Smoked Paprika Rub on the meat side of the Ono.

Place fillets on grill skin side down and cook, turning once or twice 3-4 Minutes per side.

Move Pan to Oven for 4 to 5 Minutes to finish.

Fish is done when the Ono flakes easily.

Squeeze on fresh lemon and serve hot.

Plating:

Place each Ono Fillet on a Plate with your Side Dish.


Wild Ocean Seafoods continues a 112 year tradition of providing the finest in Wild Fresh Frozen Seafood to discriminating seafood lovers and fine dining restaurants. We offer direct from the processor to your door service at the most competitive prices available! Wild Ocean Seafoods

Wild Ocean Seafoods Hawaiian Wahoo (Ono)

Tom Douglas Smoked Paprika Rub

Related : circulon classic 14 piece cookware

Tuesday, October 12, 2010

How to Cook Cod Fish

Learning how to cook cod fish is simple. Cod is a flaky fish and is good fried, baked, and poached. Slow cooking also works well to coax out the delicate flavors. Traditionally, it is served with lemon wedges and a light sauce composed of parsley. You can easily add it to stews, risottos and soups as well. One simple pan-fried recipe calls for lightly frying the cod in oil and serving it with a creamy mix of potatoes, green onions, and butter.

Other recipes add an Asian accent broiling cod with ginger and soy sauce for example, gives the fish a Japanese touch. Cod roe is actually a delicacy in Japan. For those trying to eat healthier, cod makes a great low-fat, low calorie meal. For an easy, no fuss, diet dinner, try baking cod in foil and seasoning with lemon, salt, pepper and olive oil. Accompany it with a large, leafy green salad. Another healthy diet option is to grill the cod seasoned with olive oil, Worcestershire sauce, lemon and garlic powder. You might also simply brush a couple cod filets with BBQ sauce and broil it.

Cod is also the main ingredient in fish in chips; simply batter the fish with a mixture of egg, bread crumbs and some cream, and fry it in a frying pan. Or for healthier version, bake it in the oven with Japanese panko crumbs. Additionally, you can roll the cod in a cornmeal mix and fry them in oil or bake them. As you can see, mastering how to cook cod fish is actually quite uncomplicated.

No matter how you decide to prepare your fish by poaching, broiling, grilling, stewing, etc. -- make sure not to overcook it. Think 8-10 minutes per inch of thickness, i.e. if you have 2 pieces of 1-1/2 inch thickness and weighing about 16-20 ounces, do not cook it for any more than 20-30 minutes. Your oven should be set no high than 350 F or 160 C. Grilled cod fish is done once it starts to flake.

Cod fish is extremely versatile and healthy; once you learn how to cook cod fish, the sky's the limit. Incorporate it into your diet for a healthier lifestyle.


Looking for wonderful Alaskan Seafood recipes? Check out great meals to make for your family at the Alaska Seafood Marketing Institute.

Thanks To : le creuset 9-piece cookware set anolon advanced 10-piece cookware set cuisinart multiclad unlimited 12-piece cookware

Monday, October 11, 2010

How To Make Conquer The World Fried Polenta

Call me stupid, but I always thought polenta was a Mexican dish. After all, it was made out of cornmeal, and it looked like the little sweet scoop of corn I get at the Mexican restaurants. Surprisingly enough, I had a misconception - actually, two misconceptions. Number one is that polenta is actually an Italian peasant's dish. The second misconception is that just because it says Mexican restaurant on the sign does not mean it is telling the truth (that was definitely not Mexican food).

In fact, along with pizza and pasta, polenta is one of the three staple foods of Italy. While I was never a fan of baked polenta, I fried polenta one day and it was a whole different story. I also am a firm believer that if you love your food you should know where they came from before you cook them. After all, culture lives on through the tastes and smells of food.

When researching polenta I found out some pretty terrific facts. Number one, polenta came all the way from primitive Italy. Right when they started creating compound dishes (back in their own type of cave days) was when polenta was created. Back then it was made with water and kernels of wild grasses to make a thick paste. It was then toasted and dropped on a hot stone. There was no corn yet.

Polenta was the equivalent of bread to Italy at this time. Yeast was very hard to come by at this time. Roman legions carried polenta with them everywhere. It was made of wheat, garbazo beans, or chickpea. They would toast the grains, crush them, and put them in their sacks. When they halted they would then ground the grain to gruel and boil it like porridge. They would eat it in the form of porridge or they would let it harden into semi-leavened cake. Think about it, polenta almost helped the Italians conquer the world.

Another amazing fact is the crushed grains of polenta were used to make the first genuine flour. After that (for a great period of time) nothing changed much in the lives of the peasants and, therefore; nothing changed much in the world of polenta. In the 15th century is when Mister Cristoforo Colombo brought maize back from the New World. This delicious crop was grown prosperously in Northern Italy where rainfall is very abundant. Soon after that it was used as an ingredient in polenta and became not only a peasant dish, but a dish for all, even preferred over bread and pizza. The rest is polenta history.

My polenta? I love it fried. The following is the best way to make it:

"You Could Conquer The World Fried Polenta"*

Ingredients: 1 and ½ tsp salt, 1 cup yellow cornmeal, 3 and ¼ cups boiling water, 2 tbs butter, sour cream (if desired) and ¾ cup water.

1) Spray a 9 x 5 inch loaf pan with cooking spray

2) In a saucepan, mix the cornmeal and ¾ cup water. Stir in 3 and ¼ cups boiling water and the salt. Cook over medium heat for about nine minutes, stirring constantly, until the mixture boils; reduce heat.

3) Cover and simmer for 10 minutes, stirring occasionally until thick. Spread in loaf pan.

4) Cover and refrigerate for 12 hours. Turn pan upside down to unmold.

5) Cut into ½ inch thick slice. Coat slices with flour. In a large skillet melt 2 tbs butter over low heat. Cook slices for about 5 minutes on each side until brown.

6) Enjoy with the yummy taste of sour cream on top if desired.

Sources:

Base of recipe from Betty Crocker


http://www.floria-publications.com and http://www.lifeinitaly.com

Rachael Rizzo has been acting since she was nine years old. She uses her experience to write about what the things she loves mean to her (mostly movies and baking). She is twenty-three years old and resides in beautiful Oregon.

My Links : cuisinart chef's classic 14-piece cookware set

Saturday, October 9, 2010

Turkey Fryer Recipes - Recipes For Deep Fried Turkey


Image : http://www.flickr.com


Turkey Fryer Recipes are all the rage this time of year. You normally think of fried chicken, not turkey, well you will soon discover how delicious fried turkey can be. Be careful though; follow the directions of your fryer carefully as to not cause an accident.

The following are three recipes you must try:

DEEP FRIED TURKEY
1 turkey, 12-15 lbs, thawed
5-6 gallons peanut oil
1 stick butter
3 cloves minced garlic
1 teaspoon soy sauce
1/4 lb salt pork, chopped to a fine mince
1/2 teaspoon paprika
1 large outdoor turkey fryer
1 turkey marinade injector
1 mesh strainer
salt and pepper

Set up your turkey fryer outside; make sure the fryer is away from flammable objects such as your house. It is wise to remove little children and your pets from the area you will be frying in. You will also need a heavy-duty wire to lower and raise the turkey from the grease, most fryers provide this.

The turkey must be fully thawed before frying, as excess water will cause the oil to bubble up.

Combine salt pork with minced garlic and 1 tsp. of peanut oil and fry in a pan on low heat for 30 minutes. Add to the pan soy sauce, paprika and butter and cook until butter has melted. Stain this mixture to remove bigger bits and then pour into marinade injector. Inject the turkey; remove pop-up timer and place in the refrigerator overnight.

Cooking the Turkey
30 minutes before cooking remove the turkey from the refrigerator and bring to room temperature. The oil in the fryer should be 350° degrees for optimal cooking and the turkey must be dry when going into the oil.

Most turkey fryer recipes call for peanut oil, add this up to the line inside of the turkey fryer. Slowly place the turkey breast side down into the fryer basket. Allow the oil temperature to lower to 300°F and continue frying, it is recommended that you fry for 4 minutes per pound of turkey.

Remove the turkey to a serving platter and season to taste with salt and pepper. Place the bird upside down fro at least 20 minutes so the juices will redistribute to the breast. Flip the turkey right side up and serve with garnishes of choice.

CAJUN FRIED WHOLE TURKEYS
2 whole turkeys
16 oz. bottle Italian dressing
1 tbsp. garlic powder or garlic salt
1 tbsp. onion powder or onion salt
1 tsp. celery salt
1/3 bottle paprika pepper
1/2 can of beer (optional)
3 tsps. poultry season
1 tsp. salt (omit this if using garlic or onion salt)
1 tsp. pepper (black)
1 tsp. pepper (white)
2 tsp. cayenne pepper
4 dashes Tabasco

Wrap legs with foil and-or wire. Mix all ingredients and inject into each bird at least 12 hours before cooking and place in the refrigerator. Deep-fry the turkey using peanut oil, 4 minutes per pound. The oil in the fryer should be at 340 degrees.

DEEP FRIED HONEY TURKEY
12-14 lb. turkey
5 gallons peanut oil
SEASONING:
1 bottle Italian dressing
1/8 c. Lea & Perrins
Onion salt
Lemon salt
Garlic salt
Lemon juice
4 tbsp. honey
2 tbsp. brown sugar

Heat seasonings on stove until melted down then pour though a strainer. Insert into turkey with an injector. Be sure to season the outside of the turkey as well, butter, salt and pepper works nicely, then refrigerate overnight.
Fry turkey in wire basket at 300 to 310 degrees for 45 to 55 minutes. 4 minutes per pound.

Turkey fryer recipes are pretty consistent, all go into the fryer but it's the seasonings that make them unique. Get creative and see what flavor combinations you can come up with to have a delicious fried turkey.


Wendy Pan is an accomplished niche website developer and author. To learn more about turkey fryer recipes [http://cookingaturkeymadeeasyonline.info/turkey-fryer-recipes-recipes-for-deep-fried-turkey/], please visit Cooking A Turkey Made Easy Online [http://cookingaturkeymadeeasyonline.info/] for current articles and discussions.

Recommend : cuisinart multiclad 12 piece cookware set all clad copper core 3 quart saute with lid

Friday, October 8, 2010

Chicken Wings - How to Grill Them Buffalo Style


Image : http://www.flickr.com


A buffalo wing is a certain type of chicken wing that has been prepared in a manner that was invented at a place, so legend has it, called the Anchor Bar, in Buffalo, New York. Your standard buffalo style wing is totally delicious. There is a way though, to grill wings outdoors and still get plenty of the "Buffalo Wing" taste without all the hassles (and odors) of deep frying them. First, we'll discuss how to make the classic deep fried style wing, then I'll present the quick and easy Grilled Buffalo Wing method.

Chicken Wings, Buffalo Style:


Wash and dry the wings
Cut them into thirds along the joints, discard the little tippy things
Deep fry in a fryer or big pan of hot oil, until done
Make wing sauce using Franks Red-Hot Sauce (or a comparable hot sauce) by melting one stick of butter in a saucepan and adding one bottle of hot sauce. Bring to a low boil. Remove from heat. Toss wings and hot hot sauce in a bowl until wings are coated.
Serve with celery sticks and cool ranch dressing or cream cheese dip on the side.

To make grilled buffalo wings, many of the steps are the same. I prefer to deal with bigger pieces when working on the grill, so I do not cut the wings into thirds. I cut off and discard the little tippy piece at the joint. I cook them on low, on a gas grill (for convenience purpose only, if you prefer charcoal, use it.) The rest is the same.

Chicken Wings, Grilled Buffalo Style:


Wash and dry the wings
Cut off the wing tips at the joint, and discard the tips.
Rub liberally with salt & pepper, or use a barbecue spice rub
Grill over medium low heat, turning occasionally, until cooked through, around 30 minutes or so.
Make wing sauce using Franks Red-Hot Sauce (or a comparable hot sauce) by melting one stick of butter in a saucepan and adding one bottle of hot sauce. Bring to a low boil. Remove from heat. Toss wings and hot hot-sauce in a bowl until wings are coated.
Serve with celery sticks and cool ranch dressing or cream cheese dip on the side.

Enjoy!


To receive a free recipe for Eastern Carolina Style barbecue sauce click here: http://www.bbq-jim.com. Jim Hess is an expert author who loves to cook, eat and write about real barbecue (and meat grilling). Click here: http://www.bbq-jim.com to see much more about barbecue and grilling.

Tags : t fal 10-piece cookware all clad master chef 2 14 piece cookware set kitchenaid gourmet distinctions 16 1 2 inch

Thursday, October 7, 2010

How to Cook a Really Crispy Duck or Chicken

If you're like me you love the skin on the outside of duck, if it's crispy. The texture of the meal can totally be changed with a crispy skin.

The secret is to make sure the duck is scored across the front and salted heavily.

This helps dry up the skin and makes for a super crispy skin. You will not be the only one that enjoys this Crispy Duck Recipe, but everyone else at your dinner table.

Take the duck that you're going to use for your main dish make slits in the breast with a knife and poke with a fork. Salt the breast heavily use your discretion and taste. You can use this method for any recipe you can think of.

Just use the cooking instructions from the recipe you are using. Place the bird breast down on the baking pan and cook like that for about ¾ of the total time that the recipe says to cook it for, making sure to drain the fat from the bird, usually by sticking it with a fork under the wings and legs.

During the last 1/4 of the cooking use the broil on the oven to finish cooking up the breast. This should make the skin crispy while the duck is still moist. Since this way of cooking can be used for almost any recipe for crispy duck recipe you have, it gives you more choices for the texture you want to use for your meal.

Cooking is all about mixing things up and building your own ways of cooking and recipes.

Also since you are slitting only the fatty layer of the bird you can use that to tuck away some hidden seasoning. Try tucking your favorite herbs into the slits under the skin, as the fat melts away it'll trickle down and out of the bird but first it'll seep into the meat.

This can add a new dimension to the meat, making it even more succulent. Taking these tips you should be able to use your imagination to come up with many more combos. With crispy duck recipes you can add extra flavors and also add a whole new texture to the dish.

Use these two together to try out new things, using the crispy skin to add texture to an otherwise smooth meal. So the next meals with duck you cook try out some of these combos, just using your taste and imagination. There are thousands of recipes in books and the internet to mix and match with.


Hans is author of Steaks, Seafood and Barbeque Recipes at http://www.steaks-guide.com

My Links : all clad master chef 2 14 piece cookware set all clad copper core 14 piece cookware set

Wednesday, October 6, 2010

Tips for Eating Out

You have decided. You are going to make positive changes to your eating habits in order to reduce your bad cholesterol numbers. However, working against that decision is your work situation and, out of necessity (or by choice), you eat out often. All is not lost. There are thing you can do if you eat out.

One thing that can be done, regardless of the type of restaurant, is to watch your portion sizes. Also, when you eat out, avoid deep fat fried, pan fried, sautéed food or heavily sauced food. Many restaurants will prepare food to order. For example, they may prepare you a steamed vegetable in place of a vegetable with a high caloric and/or high cholesterol sauce. Always ask for dressings, sauces and gravies on the side and then use sparingly.

Are you a Cajun food fan? Cajun food can be high in fat, cholesterol and sodium, but substitutions can be made to reduce these factors. Hush puppies would be a good thing to avoid completely. Also avoid fried crayfish, shrimp and other fried seafood. Don't order the sausage or gumbo. Ask the chef to reduce the amount of oil used when preparing blackened entrees. You can have boiled crawfish, shrimp and seafood. Grilled seafood also is fine. White rice and beans work, but do not have "dirty rice".

Chinese food is a good choice for eating out. Go for the vegetable dishes. Have chicken (not duck which has more fat). Avoid deep fat fried items and select steamed, boiled or broiled items, such as steamed dumplings. Ask the cook to leave out the MSG, salt and soy sauce. Order steamed rice rather than fried rice.

Italian food has a lot of carbohydrates but can be a good meal out for people reducing their LDL if you are careful about the sauces. Substitute marinara sauce for the cheesy, creamy sauces. Avoid floured and fried entrees and dishes baked with cheeses. Ask for the salad oil on the side.

At first thought, Mexican food would seem like a poor choice for eating out since it is loaded with saturated fat. It is fried in lard and uses so much cheese. But you can do it. Don't eat the chips, but do use the salsa for flavoring. Refried beans are not a good choice. Quesadillas and fried carnitas are not good choices; chicken fajitas are. Anything that has to be fried in fat should be avoided; chicken and beef enchiladas are a good substitute. A taco salad without the cheese or with a very small amount of cheese (a dab of light sour cream is better) is a good choice, but don't eat the shell. Select corn tortillas rather than flour tortillas.

Going to a steakhouse? As with anything, one key is portion size. So many steak houses go overboard on the size of the steak. Good for promoting the steak house, but not good for cholesterol levels. Be sure to select a lean cut. Ask to have the fat trimmed before cooking. Three ounces is a good choice. If you plan on a larger portion, plan for it throughout the day by avoiding fats during the other meals. Make good choices for your side dishes.


Michael Russell Your Independent guide to Cholesterol [http://cholesterol-guided.com/]

Visit : lodge logic pre seasoned 15 inch cast iron skillet simply calphalon nonstick 10 piece set stansport cast iron 6 piece cookware set

Monday, October 4, 2010

Chicken Biryani Recipe - Secrets of Making a Perfect Biryani


Image : http://www.flickr.com


If I ask you, "which is your favorite Indian rice recipe"?, I am sure your topmost answer will be "a biryani". Even in biryanis the most liked of all is a chicken biryani.

So here is a recipe for you to make a perfect biryani.

Ingredients required

Ingredients for marinating the chicken

* 1 Kilo Chicken on the bone cut into 12-16 pieces
* 1 cup of curd
* 1/2 Teaspoon turmeric powder
* 1 Tablespoon of ginger garlic paste
* 1 Teaspoon of coriander powder
* a little salt

Mix all of the above ingredients and let the chicken marinate for 6-12 hours, more the better.

Herbs, spices and condiments used are as follows

* 8 cloves
* 1 Cinnamon stick
* 6 green Cardamoms
* 2 Bay leaves
* 1/2 Teaspoon shahi jeera (caraway seeds)
* a few pinches grated nutmeg and mace each
* 1 Teaspoon Coriander powder
* 1 Teaspoon red Chili powder (to taste)
* 5-6 Tablespoon of chopped fresh mint
* 2-3 chopped green Chilies
* 4-5 chopped Tomatoes
* a whole bunch of fresh coriander leaves

For fried onions

About 8-9 medium size onions

Other Ingredients
* 500 g good basmati rice
* Oil for deep frying and 3-4 tablespoon for cooking
* 1 Tablespoon of ginger garlic paste
* 1/2 cup of milk
* a few strands of Saffron (kesar)
* Desi ghee (clarified butter) about 6-7 Tablespoons
* Cashew nuts ( a few or as many as you want)
* Raisins and almonds are optional
* Salt to taste

Deep fry the onions
While the chicken is marinating, slice the onions very thin. You can use a food processor for this or a slicer. Now heat oil and fry these sliced onions in batches. The heat should be medium. Definitely not high, otherwise the onions will get burned.

Stir the onions continuously for uniform browning. When they become light brown, drain them on kitchen paper. Keep them aside. They will get nice crispy as they cool down.

Cook the Chicken

Take a deep, wide mouth vessel and heat 3-4 tablespoons of oil in it. In this add the bay leaves, cloves, cinnamon, cardamoms, little bit of shahi jeera and allow to crackle. Now add a tablespoon of ginger garlic paste and stir a little. Now tip out all the marinated chicken and the marinade. Cook on a high flame so that the water gets evaporated quickly. Add the chopped tomatoes, mint, green chilies, all dry powders(coriander, chili), and salt. Cook till the chicken is cooked and the gravy (masala) is not watery. Add one third of the fried onions. Mix well. Keep aside.

Parboil the rice

Boiling rice is one of the most important part of cooking a biryani. The rice needs to be parboiled. Meaning, it should be three fourth cooked. The rest of it gets cooked on dum (when we layer the chicken and rice, seal it and put on a very slow fire).

To boil the rice take a big deep wide mouth vessel, add lots of water (at least 10 times more than rice). Add ample salt (this is very important because the rice needs to be salty when cooked). Also add a cinnamon stick, a couple of green cardamoms, a few cloves and the rest of caraway seeds (shahi jeera), for flavoring the rice.

Now boil all this for a few minutes on a high flame (7 minutes or so). This is how to check if the rice is done. Without burning your fingers, take a few grains of rice (use a clean spoon to take some out of the boiling water), break a grain, if it breaks into 3 parts easily, your rice is done.

Strain the rice and spread it on a clean surface ( a tray or something), so that it cools faster. If you want to pick out the whole spices which you added, you can do that now. Or else just let them be.

Keep all these ready

Now that the rice and chicken are cooked. Fried onions are ready. You just need to get a few more things organized, so that the layering can be done.

* Chop the coriander leaves
* Boil the milk and add crushed saffron in it. Give it a stir.
* In desi ghee, fry the cashew nuts till golden brown. Also the almonds and raisins, if using. Keep aside.
* Keep some melted desi ghee aside.

Layering the biryani

Take a heavy bottom pan with a lid (non stick is best).

Take some melted ghee and grease the bottom of the pan with it. Then

* Put a layer of rice,
* Then a layer of chicken
* followed by a layer of fried onions
* then a layer of chopped coriander.

Repeat and finish off with the rice layer. Lastly, sprinkle the leftover fried onions (if any), cashews and other nuts. Pour the saffron milk on top. Also pour some desi ghee down the sides of the pan and some on top of the rice. It will trickle down with the heat.

Yep, you are done. Seal the lid by sticking it with some chapati dough or simply fix a big foil before placing the lid. The idea is to restrict the steam from escaping. Place this pot on a very slow flame. Ideally place this vessel on top of another flat pan or tawa, so that the bottom of the pan doesn't come in direct contact with the heat source.

Leave for one hour. When you open it, what you get is the magical, flavorsome and aromatic chicken biryani. Please dig in. Don't forget to prepare a riata while your biryani is cooking. Enjoy hot biryani with a cold raita.


Manila Williams is the owner of http://www.creative-cooking-corner.com/ where she shares her easy, healthy and free recipes and cooking tips. If you liked this Chicken Biryani Recipe, then please visit her website to find out more tasty recipes. You will find many secrets of healthy cooking in store for you.

See Also : cuisinart multiclad pro stainless 12-pc cookware kitchenaid 10 piece cookware set kitchenaid gourmet distinctions 16 1 2 inch

Sunday, October 3, 2010

Chicken Kiev - The History of This Dish and How to Make It

Chicken Kiev is a classic dish and this combination of pan-fried, breaded, thinly pounded boneless chicken and herbed butter is wonderful with mashed potatoes and green beans. Perhaps you have wondered about this history of this famous boneless chicken recipe.

Russian aristocracy became very interested in French cuisine in the 1700s and they would send their Russian chefs to France to train or bring French chefs into Russia. A French chef called Nicolas Francois Appert invented Chicken Kiev in the early 1800s. He also invented canning and the method of sealing food in airtight bottles.

Kiev is the capital of Ukraine but Chicken Kiev did not get its name from there. Appert's invention became famous and Russian chefs tried to imitate Chicken Kiev, calling the dish "cotelettes de volaille" instead of Chicken Kiev. Early restaurants in New York City changed the name back to Chicken Kiev, in an attempt to attract the new Russian immigrants and this name stuck.

Chicken Kiev was a classic dish by the 1900s and it was served in Russian restaurants both in Europe and the United States, as well as in Russia. It is served with fried julienne potatoes and fresh peas in Ukraine.

Types of Herbed Butter

There are lots of variations of herb butter and you can use any herbs you like. Thyme and rosemary make a nice herbed butter for pork or chicken, basil butter is good with a Mediterranean recipe and tarragon butter is beautiful with salmon. Herbed butter is normally refrigerated after you make it, to let it set.

If you want to roll it into a log for easy cutting, like chefs do, put it in plastic wrap and roll it like a cigar. Twist the ends of the plastic wrap and refrigerate it. When it is chilled, you can slice off rounds to make Chicken Kiev or to serve with another dish.

An Easy Recipe for Chicken Kiev

This delicious recipe serves four people. Try to pound the chicken as thin as possible, using the smooth side of a mallet. If you pound it too thin or use the pointed side of the mallet, the herbed butter will leak out, so be careful.

You will need:


4 boneless chicken breasts
2 beaten eggs
1 package fine breadcrumbs
Salt and freshly ground black pepper, to taste
Oil, to pan fry
Flour

For the Herbed Butter:


1 stick softened butter
2 teaspoons chopped chervil or tarragon
2 teaspoons chopped parsley
1/4 cup minced chives
Juice of half a lemon
Salt and freshly ground black pepper, to taste

How to Make it:

Combine the herbed butter ingredients using a fork, and then chill it for a couple of hours. Put the chicken breasts between layers of plastic wrap, one at a time, pounding them until they are thin. Season them with salt and pepper. Divide the chilled herbed butter between the chicken breasts, and then fold the left and right sides of each chicken breast up, like you were rolling a burrito. Roll them from end to end, so the butter is sealed inside. Secure them with string or toothpicks if necessary.

Roll the Chicken Kievs in the flour, and then shake off the excess. Dip each one in beaten egg and finally in the breadcrumbs. Half-fill a skillet with oil and heat it to 375 degrees F. Cook the Chicken Kievs in the oil until it is browned on one side, then flip them over and cook the other side. Serve hot with potatoes and vegetables.


Boneless chicken can be used to make all kinds of recipes from a simple chicken salad to classic Chicken Kiev. We have all kinds of recipes at BonelessChickenRecipe.com, including the best chicken salad recipe, international chicken recipes, crockpot chicken recipes and much more.

BonelessChickenRecipe.com - Chicken so delightfully, moist you can almost smell it through your monitor.

Friends Link : kitchenaid gourmet distinctions 10 piece set

Saturday, October 2, 2010

Chicken Tenders - 4 Simple Steps

I always thought making fried chicken tenders (or fried chicken for that matter) was pretty straight forward.

1. put chicken in seasoned flour

2. fry it

My chicken tenders were OK, but my family wouldn't be cheering when they heard chicken tenders was on the menu that evening. Until I figured out the 4 simple steps I was missing...

1. Soak Chicken in Buttermilk (at least 15 minutes)

2. Let chicken sit after dipping in flour (about 5 minutes)

3. Make sure oil is hot enough

4. Fry in smaller batches

Initially I always just dipped my chicken in flour and put it in the oil. It never got as crispy as I wanted. I tried dipping in egg first, but that just made the batter goopy. I then saw Paula Dean dipping her chicken in buttermilk on one of her cooking shows, but by accident, I let several tenders sit on a plate waiting for the oil to get hot. It's that extra little bit of waiting that lets the "batter" set up and makes the tenders the most light and crispy.

The last 2 steps go hand in hand. If your oil isn't hot enough, it takes longer to fry your tenders and the batter won't get as light as you want it. And if you put too many pieces in your oil at once, it will drop your oil temperature very quickly, and it'll take extra long to cook, causing your batter to be heavy.

Now for the recipe, I don't use specific amounts. Eye ball it and adjust for your own tastes. What's most important is that you soak your chicken in buttermilk (about 15 minutes), after dipping in flour let it rest before frying (at least 5 minutes), make sure your oil is hot enough, and only fry a few tenders at a time.

1-2 lbs of chicken cut in to 1/4 inch thick strips

enough buttermilk to cover chicken strips in a medium size bowl

1-2 cups of flour

McCormick Grill Mates Montreal Steak Seasoning

(add more flour/seasoning if necessary to coat all chicken strips)

Fill a large pan with enough oil so that it's at least 1-1.5 inches deep. Turn heat to medium. Add a couple of shakes of steak seasoning to your flour. (more or less to your tastes) Stir. You won't be able to see the seasoning, but you'll taste it after you fry your tenders. Let chicken sit in the buttermilk for at least 15 minutes, and then take chicken 1 piece at a time and put in the flour. Cover thoroughly. Take chicken piece out of flour and put on a plate. Repeat until all chicken is floured. Let chicken rest for at least 5 minutes.

By this time your oil should be hot enough. Put 4-8 tenders in at a time (depending on the size of your pan). Set your timer for 8 minutes turning tenders over half way through. Take your tenders out and cool on a wire rack. Best served with white country gravy.

If your tenders aren't golden after 8 minutes, your oil isn't hot enough. Play around with turning up the heat or frying fewer tenders at a time. You might also just have to wait a bit longer to start frying so that your oil is hot enough. Once you get the system down, you'll have extra crispy, juicy chicken tenders your family will absolutely LOVE!


Danielle Eidson is a Certified Master Integrative Coach and Certified Spiritual Divorce Coach personally trained by NY Times best selling author, Debbie Ford. Her passion is helping people heal from painful relationships.

Do you know you have relationships with your food? Join Danielle in healing your relationship with food and creating a life that you love!

To find out more about her programs go to: http://HealingYourRelationships.com/

My Links : anolon advanced 12 piece cookware set

Friday, October 1, 2010

Chicken Manchurian Recipe

Chicken Manchurian is very famous dish from Chinese cuisine, it is prepared in variety of ways with different meats either chicken, prawns or beef. I usually make chicken Manchurian with pineapple because it enhances its taste many times and gives extra sweet flavor to the sauce. Vinegar is not used in this recipe since I used chili garlic sauce which has sweet and sour taste but you may add vinegar if you want more strong sour taste. This chicken Manchurian recipe is prepared in just under 30 minutes and best for 4 people serving.

Ingredients:

For Fried Chicken:

500 gm boneless chicken (cut in small cubes)
1/2 cup all purpose flour
2 tbspn corn flour
Pinch of salt
1 egg
Oil for deep frying

For Manchurian Sauce:

1/2 cup chopped pineapple
2-3 garlic cloves (finely chopped)
1/2 cup tomato paste
1/4 cup ketchup
1/4 cup chili garlic sauce
1 tspn crushed red pepper
1 tspn red pepper powder
Salt to taste
1/2 cup water
1/4 cup oil
Cornstarch as required

Cooking Instructions:

1. Marinate chicken in flour, corn flour, salt and egg. If you feel that the batter is thick, then add cold water accordingly make sure that the batter would be of normal consistency and just enough to coat the whole chicken pieces.

2. Heat oil in a a deep sauce pan and put the marinated chicken pieces one by one in the oil for deep frying on medium flame. Take out the fried chicken pieces when they turn into light golden in color.

3. To make sauce for Manchurian, heat oil in a sauce pan and fry garlic for just a minute.

4. After that add pineapple, tomato paste, tomato ketchup and chili garlic sauce. Mix all of them together and cook on medium heat for 2-3 minutes.

5. Now add fried chicken pieces, red chili powder, crushed red chili, salt and water. Stir the sauce and chicken and let it cook for few minutes by covering the pan until the sauce starts to boil.

6. In the end, add cornstarch according to your need that how much thick sauce you want. Cook the Manchurian for 2-3 minutes more and then switch off the flame.

7. Take out the delicious chicken Manchurian in a sizzling dish and serve it with vegetable fried rice.


For more recipes Visit: Easy recipes Blog The author of this article runs a cooking blog where he and many other food lovers post various easy to cook food recipes including vegetable recipes, beef, snacks, chicken, BBQ & grill, desserts, cakes, drinks, salads, and many other meal ideas. The aim of his blog is to deliver the best easy to make cooking recipes to all foodies.

Copyright 2009 RecipeDose.com. You are allowed to use this article provided that no changes are made to the article, author name is not removed and all links to our site remain active and click able.

Friends Link : t fal 10-piece cookware anolon advanced 12 inch open round griddle calphalon unison 10 piece set